Assign Actual Dates in Microsoft Project using Task Details Form
When it comes to updating actual dates in Microsoft Project, there are 2 ways I know of, either by displaying the actual start and actual finish columns and then updating the dates

or by displaying the Task Details Form and assigning actual start and/or actual finish dates.
The Task Details Form, which is very similar to the Activity Details Form in Primavera P6, is not displayed by default in Microsoft Project and this quick tip is to show you how to enable this form.
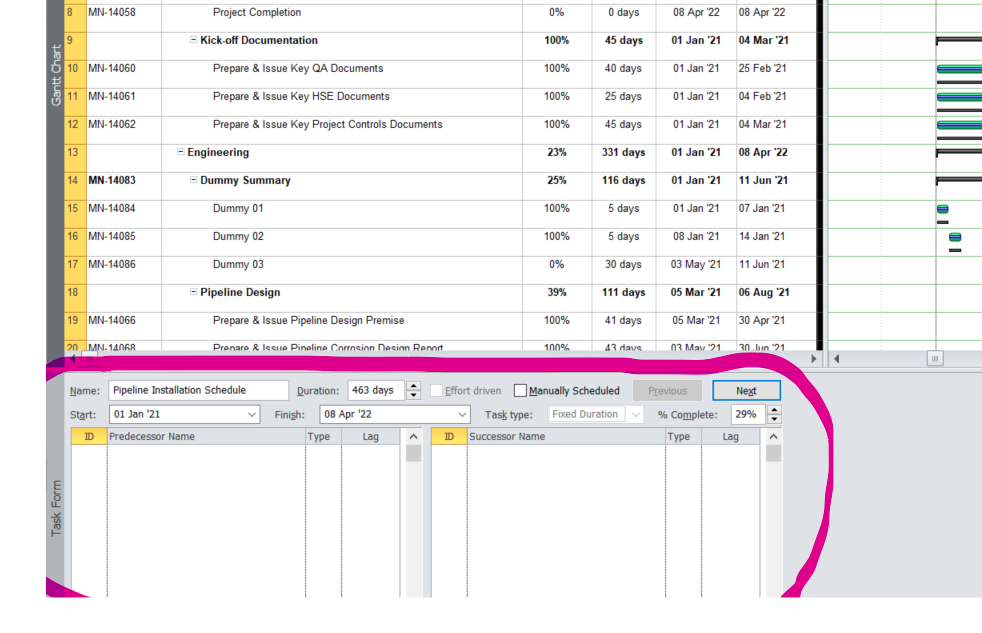
The default form that is usually displayed at the bottom of the Microsoft Project interface is the Task Form and as you can see from the image below, there is no option for entering actual dates.
To enable the Task Details Form, click on the Task tab on the ribbon and from the Properties group, click on Details and the Task Form at the bottom of the Microsoft Project interface will change to Task Details Form.


As you can see from the image above, the Task Details Form, comes with 3 dates options: Current, Baseline and Actual date fields, giving you the fields you need to assign actual date and actual finish dates.
You can do this by ticking the Actual radio button and either pick start and/or finish dates from the drop down-down box or manually enter start and/or finish dates by typing the dates using the dd-mm-yy date format.
You can watch the video below for a demonstration of how to use the Task Details Form to assign actual dates.